
This recipe will detail a federation of Office 365 with a cloud instance of Workspace ONE Access, the product formerly know as VMware Identity Manger. It's a very quick and dirty, all in approach, to an integration between Workspace ONE and Office 365 that's ideal for POCs and lab environments. It's certainly not the only way to integrate Office 365 with Workspace ONE. The ideal production deployment strategy very much depends on the specifics of your circumstances, like current WS1 licensing, ADFS requirements or other identity providers in the mix. However, as far as standing something up quickly in a lab so that you can explore options of a Office 365/WS1 integration, I think this deployment model is the cats pajamas and I'm super excited to share it.
With this recipe, Azure AD Connect is used to sync users from a local on-premises AD environment with an Azure tenant. While users will be synced using Azure AD Connect, actual authentication against the local AD environment will be handled through Workspace ONE Access through the deployment of an on-premise vIDM Connector. Doing this allows for a very straight forward federation of Office 365 with Workspace ONE, bypassing the need for ADFS. For additional context and pretty pictures about this strategy, check out this primer post. Otherwise, below is a quick overview of the recipe, followed by actual steps.
Basic Resource Requirements
Azure AD/Office 365 Subscription
Workspace ONE Access Cloud Tenant (The Artist Formerly Known As vIDM)
1 Small On Premise Server For AD Connect
1 Small On Premise Server For vIDM Connector
Elbow grease and access rights
Deployment Outline
Preparing Office 365:
Spinning up an Office 365 environment
Prepare non-routable domain for directory synchronization
Integrate with on-premises AD through Azure AD Connect
Prepare Workspace One Access Environment:
Deploy vIDM Connector
Bind to on-premises AD
Enable outbound mode for vIDM Connector
Integrate Office 365 with Workspace ONE Access:
Add Office 365 To Catalog
Federate Azure Tenant With Workspace ONE Access
Configure Conditional Access Policies
Preparing Office 365
Spinning Up An Office 365 Environment
To get access to an Azure/Office 365 subscription, I'm leveraging the Office 365 Developer program through my MSDN subscription. This provides year round access to an Office 365 environment for development purposes. For more information, you can check out this FAQ. If you can get access to this program I highly recommend it. Otherwise, you can get a free 30 day Office 365 eval from here.
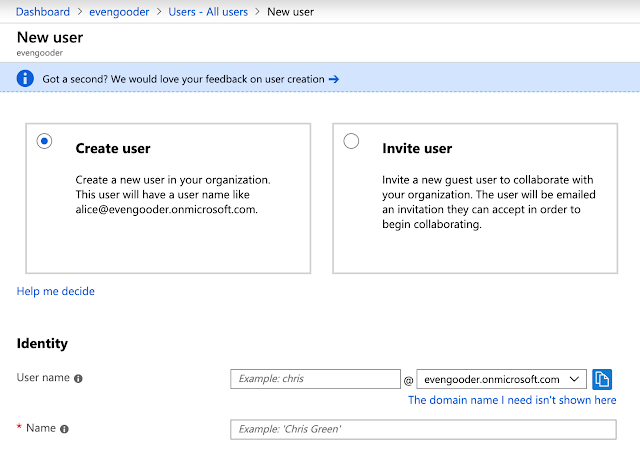
Setting up my tenant was a fairly straightforward process. Eventually I was prompted for a domain name to use for my subscription.

This lead to the creation of an Azure tenant environment for Office 365, with the domain name of evengooder.onmicrosoft.com. At this point, any account I created directly in my
Azure environment would have the UPN suffix of evengooder.onmicrosoft.com.
In turn, this new account provisioned in Azure automatically is populated in the Office 365 portal where an admin can entitle the user to an Office license.
Using A Friendlier UPN Suffix
If you want a friendlier UPN suffix, one without the onmicrosoft.com, you can add a custom domain name. In my environment, an Office 365 E3 Developer wizard guided me through the process of adding a public domain name I already own, evengooder.com.

After providing evengooder.com as a domain to connect to, I was prompted for my GoDaddy credentials to prove I owned the domain.

After authorizing Microsoft to make changes to evengooder.com, I was walked through some necessary DNS changes. Once completed, I ended up with a 2nd custom domain name, evengooder.com.

At this point, when creating users directly in the Azure environment, they can have either the UPN suffix of evengooder.com or evengooder.onmicrosoft.com.

Preparing A Non-routable Domain For Directory Synchronization
Because my AD lab is leveraging a non-routable .local domain name, LAB.LOCAL, I had one more step before deploying Azure AD Connect. I needed to add evengooder.com as an alternative UPN suffix for members of the LAB.LOCAL domain. Fortunately, a brainy colleague of mine, Leonardo Valente, pointed me to a very relevant Microsoft article that provides guidance on this procedure. Here are the steps.
First, you need to log into Active Directory Domains And Trusts. Right click on Active Directory Domains And Trusts and select properties.

Next, add the friendly UPN suffix you want to use against your Office 365 environment. In my case, it was the public domain name evengooder.com.

Finally, navigate to the account properties of any AD account you want to have access to Office 365. Change their logon name to leverage the new UPN suffix.

At this point, when the user syncs to the Azure AD environment, they will show up as jj@evengooder.com and will be able to log into the Office environment accordingly. Before that happens though, Azure AD Connect needs to be stood up and configured.
Integrate With On Premise AD with Azure AD Connect
To sync your on-premises AD users to an Azure tenant , you deploy Azure AD connect. It also can provide authentication of your local AD users against your Azure tenant through features like Password Hash Synchronization (PHS) and Pass-through Authentication (PTA).

After downloading Azure AD Connect from my Azure admin portal, I executed the installer on my local server and then walked through a wizard. For the initial setup I went with Pass-through Authentication.

Next, I provided the wizard global admin credentials to Azure tenant. Then, when prompted for a on-premises directory to sync with, I selected LAB.LOCAL.

Then I provided enterprise admin credentials for LAB.LOCAL.

Then I opted for the user principal name as an attribute to use for the Azure AD username.

I then went on to next my way through the next 4 or 5 screens, essentially sticking with defaults. Soon, the wizard completed and I found members from my local AD environment had been successfully synced with my Azure environment. User who had the alternative UPN suffix configured in AD showed up accordingly under my Azure tenant users.

So, vditest2 and vditest3 are example of AD accounts configured with the alternative UPN. Vditest4 is an example of account that didn't have the alternative UPN configured, so it defaulted to vditest4@evengooder.onmicrosoft.com during the import. Regardless, I could now log into the office environment using these local AD account credentials and the appropriate UPN.

Prepare Workspace ONE Access Environment
Fortunately, prior to this integration I already had access to a Workspace ONE Access (vIDM) cloud hosted tenant. If you reach out to your VMware sales rep they could help you get access to a test tenant. Also, if you register at VMware TestDrive, https://www.vmwdemo.com/, you can get access to a tenant there as well. Once you have access to a Workspace ONE Access tenant, the next step is to integrate it with your local AD environment using vIDM Connector. This involves downloading and installing the connector, selecting proper user attributes, and binding to the local AD domain. Finally, you'll need to enable the connector in outbound mode so that folks outside your trusted network will be able to authenticate against the local AD environment.
Deploy vIDM Connector
The latest version of vIDM Connector is 19.03, which you can download from here. For a small test deployment you need a Windows server with 2vCPU, 6 gigs of RAM and 50 gigs of storage. You need network connectivity to internal resources like AD and DNS. Also, you need outbound 443 access from your vIDM Connector to the Workspace ONE Access tenant. Essentially, make sure it has internet access. For more specifics on system requirements, check out the official documentation here.
After executing the installer, you'll get the welcome window.

Next your way through the next few screens, accepting the defaults. Confirm you have the proper hostname for the vIDM Connector.

Run the connector service as a domain user.

Click next, then next on the following screens and then finally install. After a successful installation, you'll get redirected to port 8443 on the local host. This is where you'll complete the setup from.

Click next on the first screen.

After setting the admin password for this local connector instance, you'll get prompted for an activation code. You need to grab the code from your Workspace ONE Access tenant.

Log into your tenant environment. Navigate to Identity & Access Management --> Setup --> Connectors. You'll see the unactivated connector.

Click on the view activation code option. From there you'll have an option to generate an activation code. Generate the activation code, then copy and paste that activation code into wizard for the connector activation.

If things go well, you'll get the, "Setup is complete," message. Now under Connectors within the admin console you'll see more info populated about the connector.

Next, we have to associate this connector with a directory.
Configure The Required User Attributes
Prior to binding to your local domain, you need to ensure you have the required user attributes configured for Office 365 integration . You'll need the user principal name and objectguid attributes enabled. Navigate to Identity & Access Manager --> Setup --> User Attributes. You should have something like this:

Bind To On-Premises AD
After confirming your attributes are straight, proceed to Identity & Access Management --> Manage --> Directories click Add Directory.

Select the option for, "Add Active Directory over LDAP/IWA."

Add the name of your directory. Ensure your vIDM Connector is selected as the Sync Connector. Choose Yes for, "Do you want this Connector to also perform authentication." Then, scroll down a bit and you'll get prompted for an account to bind with. Enter the bind account name in a user principal name format.

Hit Save & Next.

I then selected my lab.local domain.

I then nexted my way through the next several screens, providing DNs like cn=users,dc=lab,dc=local to filter out users and groups. After getting a summary of changes the sync settings would trigger, I clicked on, "Sync Directory."

After a successful sync, you'll see a bunch of new users under the Users & Groups tab.
Authentication In Inbound Mode
By default, after creating a directory and and associating it with our vIDM Connector, you're connector can authenticate AD user in inbound mode, which involves users directly connecting against the vIDM connector located on the trusted network. Essentially, after pointing your browser to the Workspace ONE Access tenant in the cloud and selecting the local AD domain you want to authenticate against, you're redirected to the URL of the vIDM Connector.

If you want folks to authenticate directly through cloud tenant, rather than against the vIDM connector, you can enable outbound mode.
Enabling Outbound Mode For vIDM Connector

We can enable outbound mode by associating our new Connector with the Built-In identity provider. Navigate to Identity And Access Management --> Manage --> Identity Providers.

Click on the hyperlink for Built-in. Select the relevant directory and network ranges. Then scroll down.

Under Connectors, select your new vIDM Connector. Then click on the, "Add Connector," button.

You'll now have the option to select Connector Authentication Methods. Select the option for, "Password (cloud deployment)."

After changing your access policy rules to use the Password (cloud deployment) authentication option, you'll have the ability to authenticate against the AD environment directly from your SaaS instances, without having your browser redirected to the vIDM Connector.
Integrate Office tenant with Workspace Access
With both your Office 365 tenant and your Workspace One Access Manager cloud tenant integrated with your local AD domain, you can now proceed with the federation of the two environments. The first step is to add your Office 365 environment as an applicationto your Access manager catalog as a service provider. Then, you enable your Workspace One tenant as identity provider for Office 365 through a PowerShell command that federates the two environments. Add Office 365 To Catalog
Fortunately, there’s already a preconfigured Office 365 integration wizard you can follow to guide you through the integration. Within your Workspace One Access manager
environment, navigate to Catalog --> Web Apps.

Then click on the, New button to create a new SaaS application.

Click on the option to browse from catalog. Look for the preconfigured application called, "Office
365 with Provisioning."

Give it a name that will be displayed in your user's portals. I lack imagination, so I'm just going with Office 365.

Next, we have to populate some critical SAML information. Fortunately, a lot of information is already preconfigured for us. We essentially have only 3 pieces of information we have to add to the definition. These are a target URL, a tenant and an issuer. The target URL is where you get redirected to after SAML request is accepted. For my lab, I'm going with office.com. (I could just as well go with a specific office application by going with https://www.office.com/launch/word or https://www.office.com/launch/excel.) For this integration, I want to provided access to the entire office suite, so I'm just going with office.com.

Next, I have to enter in a tenant and an issuer. For the tenant, I'm entering the tenant url for my Office 365/Azure registered domain, evengooder.com. For the issuer, I'm going with the URL of my Workspace One Access (vIDM) tenant, justinjohnson.vmwareidentity.com.

Now, you’ll see an entry for Office 365 within the catalog.

To actually make this configured application work, we have to federate the Office 365 tenant with our Workspace One Access tenant. All this will take is some very ugly PowerShell commands.
Federate Azure Tenant With Workspace ONE Access
With Office 365 added to your catalog you can complete the integration through a somewhat intimidating PowerShell command. The first step is adding the MSOline module to your PowerShell environment. For my desktop, in order to successfully install MSOnline module, I first had to install the Microsoft Online Services Sign-In Assistant. This is something I downloaded from here. With this component installed, I was able to install the module with this command:
Install-Module -Name MSOnline
After installing the module, you should be able to run Connect-MsolService in order to connect to your Azure tenant. You’ll get prompted for your credentials.

Assuming your credentials are accepted, you’ll now have access to your tenant environment. Run Get-Msoldomain to observe accessible domains within your environment.

Before running a really long ugly PowerShell command, you need to make sure the domain you're going to federate isn't the primary domain. Accordingly, I navigated to the custom domain names section of the Azure Active Directory Admin Console and selected the evengooder.onmicrosoft.com domain. After drilling into this custom domain name I clicked on the option, "Make Primary."

After confirming the action I was able to proceed with the federation.

With the domain properly configured and an active connection to the Azure tenant through Connect-MsolService, there's just two PowerShell commands left to federate the environments. To get the syntax correct, I leaned on a blog post by Peter Bjork titled, "VMware Identity Manager 2.8 – Office 365 User Provisioning and Federation." Within the article, he includes a wonderfully convenient template to work from. Here's the template for the first command:
Set-MsolDomainAuthentication -DomainName < O365 registered Domain > -Authentication Federated -IssuerUri “<serviceportal.customer>” -FederationBrandName “<Customer.com>” -PassiveLogOnUri “https://< mycompany.vmwareidentity.com >/SAAS/API/1.0/POST/sso” -ActiveLogOnUri “https://< mycompany.vmwareidentity.com >/SAAS/auth/wsfed/activelogon” -LogOffUri “https://login.microsoftonline.com/logout.srf”
And for the second command, he provides this template:
Set-MsolDomainFederationSettings -DomainName < O365 registered Domain > -MetadataExchangeUri “< https:// mycompany.vmwareidentity.com SAAS/auth/wsfed/services/mex >” -SigningCertificate < X509Certificate >
To determine how to populate the different fields, I took advantage of presentation by Dean Flaming, "VMware Identity Manager and Office 365 Integration". Here's a very relevant slide from that demo:

Accordingly, based on the particular of my installation, my first command used the following values:
DomainName = evengooder.com
Federation Brand Name = EvenGooder Inc
PassiveLongUri = https://justinjohnson.vmwareidentity.com/SAAS/API/1.0/POST/sso
ActiveLogOnUri = https://justinjohnson.vmwareidentity.com/SAAS/auth/wsfed/activelogon
Leading to a command of:
Set-MsolDomainAuthentication -DomainName evengooder.com -Authentication Federated -IssuerUri justinjohnson.vmwareidentity.com -FederationBrandName “EvenGooder Inc.” -PassiveLogOnUri https://justinjohnson.vmwareidentity.com/SAAS/API/1.0/POST/sso -ActiveLogOnUri https://justinjohnson.vmwareidentity.com/SAAS/auth/wsfed/activelogon -LogOffUri https://login.microsoftonline.com/logout.srf
Also, please note that this entire command must be on a single line.
Then, for the second command, I needed the signing certificate from your Workspace One Access tenant. Within the console I navigated to Catalog --> Web Apps. From there I clicked on settings, then selected SAML Metadata under SaaS Apps.

Following Mr. Flamings instructions, I yanked off quotes, along with -----BEGIN CERTIFICATE----- and -----END CERTIFICATE-----, so that there was only one long alphanumeric string for the certificate value. My command ended up looking like this:
Set-MsolDomainFederationSettings -DomainName evengooder.com -MetadataExchangeUri https://justinjohnson.vmwareidentity.com/SAAS/auth/wsfed/services/mex -SigningCertificate MIIFHzCCAwegAwIB<REALLY_REALLY_REALLY_LONG_ALPHA_NUMERIC_STRING_REPRESENTING_THE_SIGNING_CERT>
Again, this command too must be on a single line.
The resulting output from the PowerShell console was rather uneventful.

However, after executing the command, I got the magic I was looking for. Issuing the command Get-MsolDomainFederationSettings helped confirm a successful federation.

More notably, signing into Office 365 from Workspace ONE portal started working. With the default access policy in place, providing my AD credentials to a Workspace One authentication prompt was enough to get me access to Office 365.
Configure Conditional Access Policies
With Workspace ONE Access now federated with Office 365, you can leverage conditional access policies to control access to Office 365. This means any authentication methods enabled for Workspace ONE can be leveraged for Office 365 access. For example, with your on premise domain joined desktops, you could SSO through Kerberos. Here's a video recording of accessing Office 365 from an on premise virtual desktop leveraging kerberos:
And here's an example of Kerberos at work should the user try accessing Office 365 directly. They're briefly redirected to WS1, then handed back to Office 365 completed authenticated.
ReplyDeletethis is really a good informative website i have ever every seen. i have got a lot of good knowledge from
this site and i am waiting for the next blog.
keep it up and give us good information
for more information Office 365 Email Signature
This comment has been removed by a blog administrator.
ReplyDeleteThis comment has been removed by a blog administrator.
ReplyDeletehi Even Gooder, its really good blog to setup VIDM on computer browser to access office resources via vmware conditional access. i would like to get knowledge on how to setup VIDM on mobile devices. could you please help me by providing such a knowledge on VIDM for mobile outlook ios and android app. thanks in advanced.
ReplyDelete