Wednesday, November 21, 2018

Sorting Through All The Hubbub Around Workspace One Intelligent Hub

Workspace One Intelligent Hub has been generally available since late October 2018.  It's essentially an updated and rebranded version of the AirWatch agent, with the major added capability of providing an app catalog.  Before it's release, if you wanted the full blown Workspace One experience on your devices you needed to install both the AirWatch agent and Workspace One App.  Now all that functionality can be delivered through this single new app, the Intelligent Hub.


Intelligent Hub has full feature parity with the former AirWatch agent.   For pure Workspace One UEM (AirWatch) deployments there's no real difference aside from the name changing and rebranding.   However, the new catalog functionality it offers introduces dependencies not previously required by the Workspace One App it's intended to replace.   To provide catalog services from Intelligent Hub you need to configure Hub Services ahead of time.  These Hub Services are co-located in VMware Identity Manager cloud-hosted environment and are an absolute requirement if you want to provide an app catalog directly from the Intelligent Hub app. 

Relax, It's Not That Bad A Situation For Workspace One Admins


As a cranky techie that hates change, initially I was a bit put off by this new app.   The prospect of a migration from the Workspace One app to Intelligent Hub was intimidating, especially given the new dependencies.   However, there's a couple pieces of good news that really mitigated my concerns. First, the configuration of Hub services isn't exactly rocket science.  Configuring Hub Services within my Workspace One lab environment, one that already had vIDM and Workspace One UEM fully integrated, was for the most part straight forward and uneventful.  Second, the Intelligent Hub app, even with it's Hub Catalog enabled, can run side by side with the Workspace One App on the same device.   So you can configure and enable Hub Catalog on endpoint devices, but can postpone an actual migration from the Workspace One App till a more convenient and opportune time for you users.  

Given these 2 pieces of good news, and the promise of a better more interactive service that Hub Catalog can offer, there's only a few reasons why you wouldn't proceed with the configuration of Hub Services and publishing of the Hub Catalog:

  • You have an on premise instance of vIDM
  • You're using a Workspace One UEM version below 1810
  • You're attached to the Workspace One App for sentimental reasons 
  • The possible future deprecation of the Workspace One App is a reflection of your own mortality and you don't have time for an existential crisis

Unfortunately, Hub Catalog isn't currently supported for on premise implementations of vIDM and only works with vIDM cloud-hosted.   So customers using on premise vIDM for a Workspace One deployment should continue using the Workspace One App for catalog services.  The same goes for folks using a 9.x version of Workspace One UEM (AirWatch).   They can continue to use the Workspace One App app as well.  Otherwise, for folks who'd like to take the Hub Catalog for a test spin, here's the steps I followed to enable the Hub Catalog in my own lab environment. 

Enabling Hub App Catalog


Both the Workspace One UEM and vIDM include links to Hub Configuration.  Within the Workspace One UEM console, it can be access from Groups & Settings --> Hub Configuration.  On this initial Hub Configuration page, I entered in my vIDM tenant URL and then clicked Launch.  


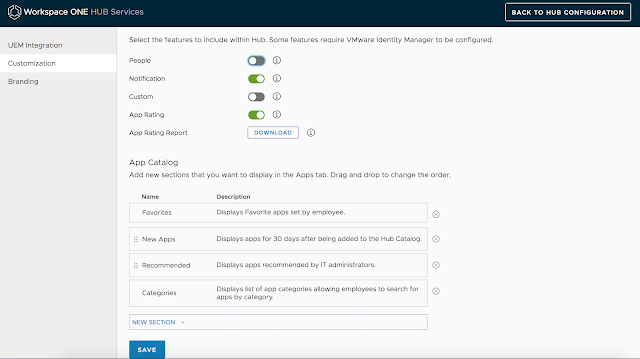
At the customization page, I accepted the defaults.
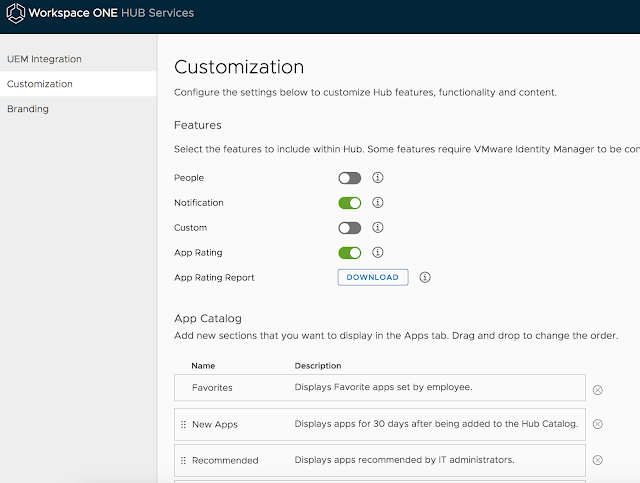


Then I clicked save. 


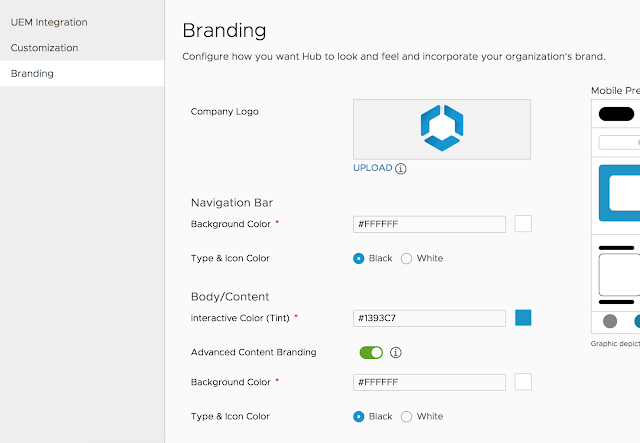
Next, I accepted the defaults for branding and clicked save. 


Phhhhheeeeeeeeewwwwww!!!!!! Tired yet?  Well dig deep and push just a little harder.  We still have a few buttons to push. 


Setting The Source Authentication For Intelligent Hub To Identity Manager 


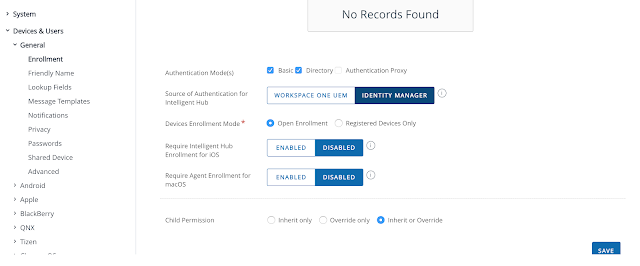
The official guidance indicates that when fully integrating Hub Services with vIDM, you need to select Identity Manager as the source of authentication for Intelligent Hub.  Accordingly, I navigated to Devices > Devices Settings > Devices & Users > General > Enrollment, then selected Identity Manager authentication manager as the source of authentication for Hub and clicked save.


Publishing The Hub Catalog 


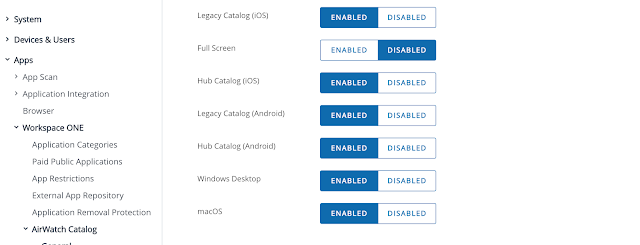
Finally, I had to publish the Hub Catalog for iOS.    To do that, I navigated to Groups & Settings > All settings > Apps > Workspace ONE > AirWatch Catalog > General.  
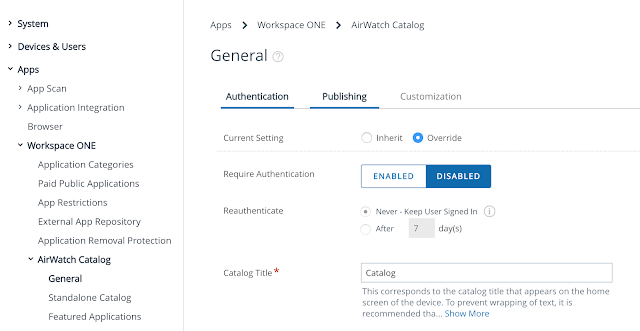


Then I clicked override, enabled Hub Catalog (iOS) and clicked save. 


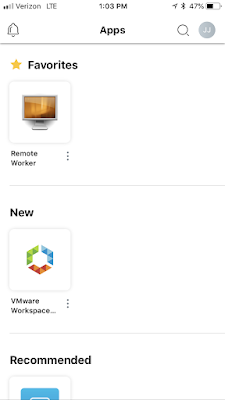
After performing the steps above, Hub Catalog was displayed after loading up the Intelligent Hub from the home screen.   On the first screen, I could seen, among my favorites my virtual desktop entitlement: 


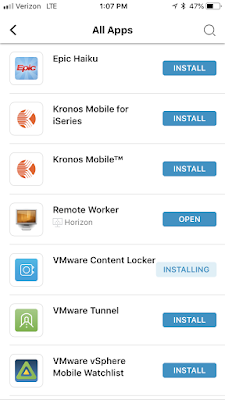
I also found the self service catalog for the provisioning of mobile apps I'd been entitled to.  


Running Both Catalogs Side By Side 


As I previously mentioned, configuring Hub Services wasn't exactly rocket science, which takes the edge off making this transition.  Further, there's the fact that both catalogs can theoretically exist side side on the same device, which means you can enable the Hub Catalog on users devices without having to force an immediate transition away from the Workspace One app.  Here's a video demonstration of the Hub Catalog and Workspace One App catalog functioning from the same device:


Sunday, November 4, 2018

Integrating An On Premises RADIUS Solution With Cloud Hosted vIDM

With a VMware Identity Manger Cloud deployment you can use the vIDM Connector to integrate with a RADIUS instance located in your trusted network.  At that point, with the connector acting as a proxy between your RAIDUS server and vIDM Cloud instance, you can begin to mandate RADIUS authentication for endpoints connecting from anywhere, either for access to specific apps or general access to your Workspace One portal.  Further, leveraging vIDM conditional access policies, you can judiciously enforce or bypass 2FA requirements based on the users context or device posture.  For this post, I'm going to add 2FA as a requirement for access to Horizon when a user connects from a browser on an untrusted device.   


This recipe uses the 2018 September release of VMware Identity Manager Cloud, windows based vIDM Connector 2018.8.1 and a RADIUS server built with Ubuntu 16.04, FreeRADIUS and Google Authenticator.  For guidance on getting vIDM Connector setup, check out this previous post.   If you already have access to your own RADIUS solution, I'd go ahead and stick with that, otherwise, here's a recipe for standing up a free RADIUS solution using Google Authenticator.  Once you have your vIDM Connector stood up and RADIUS server configured to allow this Connector as a RADIUS client,  here are the steps you'd follow to integrate your on premises RADIUS solution through your vIDM Connector.   

Configuring The RADIUS Authentication Adapter


First, go to Identity & Access Management --> Setup -->  Connectors. Click on the Worker link within the Worker column for the vIDM connector you're looking to leverage for the integration. 


Next, click on the Auth Adapters option.  


From here, click on the hyperlink for RadiusAuthAdapter.  


At that point you'll get redirected to your vIDM Connector, so make sure you have network access to the vIDM Connector when performing this step.   


Populate the authentication adapter with info relevant to your RADIUS implementation, like the RADIUS server address, timeout, authentication port, authentication type and shared secret.   Then click save.  At this point, RadiusAuthAdapter will show up as enabled under Auth Adapters.  


Next, we want to enable this authentication method on our Built-in adapter.  Navigate to Identity and Access Management --> Setup --> and Identity Providers.   Click on the hyperlink for your Built-in provider. 


Scroll down to the Connector Authentication methods for your Connector and enable the option for RADIUS (cloud deployment).  


Then click save to make the new settings stick.

Mandate RADIUS Authentication Through An Access Policy


At this point, we can use access policies to mandate RADIUS authentication for either general Workspace One portal access or for individual applications.   For example, to pick on Mac users, I've edited the default policy to require RADIUS authentication for Mac users in order to login into the Workspace One.   After navigating to Identity & Access Management --> Manage --> Policies, I clicked on the option to, "Edit Default Policy."  


From there, I added a new access rule for Mac users.  Here's what it looks like:


Now, when I try to authenticate to vIDM from my Macbook pro, I'm initially prompted to provide my RADIUS passcode, rather than the default of AD credentials. 


Another option is to mandate RADIUS authentication for an individual application, rather than for general access to the portal.   For example, I can mandate RADIUS authentication for access to a Horizon environment.   So, initially, the user can access their portal with AD credentials, but then will be prompted for a RADIUS passcode when they try to launch their desktop.  Accordingly, on access policy defined for a specific Horizon desktop pool, I've added the following access rule: 


Now, my users logs into Workspace One using AD credentials and sees the virtual desktop their entitled to.  


However, when they double click on the entitlement, they're redirected to a prompt for their RADIUS passcode. 


After a valid RADIUS passcode is provided access is granted to the virtual desktop. 


Saturday, October 6, 2018

Configuring Mobile SSO For iOS In Workspace One UEM (AirWatch)

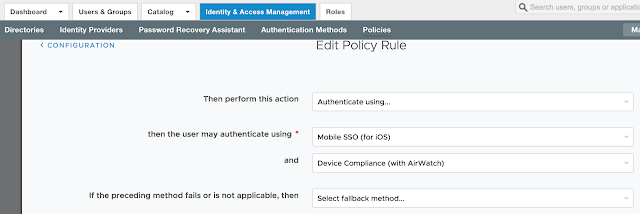
A perquisite for leveraging AirWatch device compliance in vIDM is the configuration of Mobile SSO for iOS.  The Workspace One deployment guide indicates that the device compliance authentication method, "works in an authentication chain with Mobile SSO for iOS."  Accordingly, the access policy involves combining the two methods together and looks like this:


Long story short, we need to get Mobile SSO for iOS setup and configured properly before we can take advantage of device dompliance as an authentication method.   To achieve this, we're first going to enable the built in certificate authority for AirWatch.   Then we'll enable and configure the Mobile SSO for iOS authentication method.  Next, we'll associate this authentication method with the new built-in IDM we're going to create.  Finally, we'll push out required identity provider settings onto the target devices using a special iOS profile.  

Enable AirWatch Certificate Authority


While there's the option to use a Microsoft Certificate Authority, the path of least resistance is to  leverage the built in certificate authority AirWatch can provide.   To enable it, navigate to Groups And Settings --> All Settings --> System --> Enterprise Integration --> VMware Identity --> Configuration.  Click on the enable button for Certificate Provisioning.


After enabling certificate provisioning you'll see some info about the issuer certificate populated on the screen.  


Click the export button for the Issuer Certificate.  You'll need this certificate to configure the Mobile SSO for iOS authentication method in vIDM.

Configuring The Mobile SSO (for iOS) Authentication Method


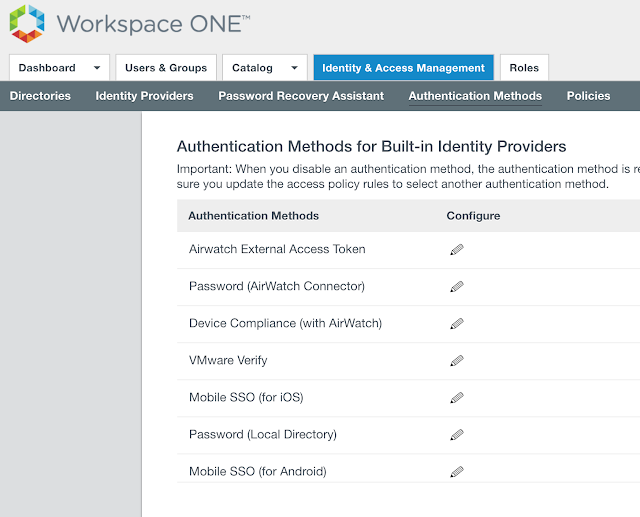
In the vIDM admin console, navigate to Identity & Access Management --> Manage --> Authentication Methods.   Click the pencil for Mobile SSO (for iOS).


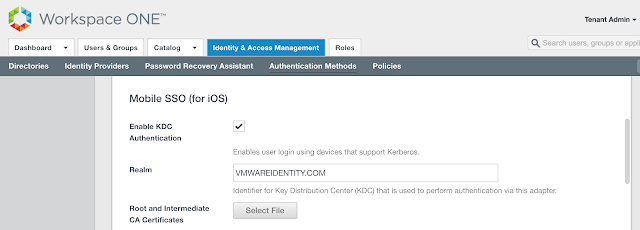
You want to check the box for, "Enable KDC Authentication."


The realm will be automatically populated.  Next, click on the Select File button to upload the issuer certificate we just exported from AirWatch.  


Navigate to the certificate. 


Click okay to confirm and upload the file.  


After a successful upload you'll see info about the certificate populate on the screen. 


Also, for a reason I can't explain, the device compliance authentication method wouldn't work for me till I unchecked the option for, "Enable OCSP," and, "Send OCSP Nonce."  Don't ask me why it was breaking things.  All I know is that while googling an error message and following the suggestion of disabling OCSP in the following post, I was up and running:

https://communities.vmware.com/thread/547237

Finally, click save.  You'll get a pop up message that the adapter has been updated. 


Create A Built-in IDM And Associate It With Mobile SSO For iOS 


Navigate to Identity & Access Management --> Mange --> Identity Providers.   Click on Add Identity Provider and select the option for, "Create Built-in IDP."  


Give it a fun name and select the appropriate directories and network ranges.   


Under Authentication Methods check the options for Device Compliance (with AirWatch) and Mobile SSO (for iOS).   Finally, click Add.  


Now, when you navigate back to the newly created provider there's an option to download the certificate.  Download the certificate.  This cert will get pushed out to your iOS device by means of a device profile. 

Creating An Apple iOS Profile To Push Out Identity Provider Settings To Your Devices 


You'll create an iOS profile in AirWatch to push out vIDM settings to your endpoint devices.  Navigate to Devices --> Profiles & Resources --> Profile.  Click on Add Profile.


Select iOS as the profile type. 


Name the profile iOSKerberos.  


Scroll down to SCEP and click on configure. 


From the drop down menu select AirWatch Certificate Authority for both the credential source and certificate authority.   Select Single Sign-On for the certificate template. 


Scroll down to Credentials an select configure.  


Select the upload option and click on the upload button. 


Navigate to the KDC certificate you just exported from the identity provider. 


Info about the cert will get populated on the screen. 


Finally, scroll down to Single Sign-On.  Click on the configure button. 


For the account name enter in Kerberos.   For the Kerberos Principal Name, click + and select {EnrollmentUser}.    For the realm name, enter in the realm name of your tenant.  (Most likely VMWAREIDENTITY.COM.) Under renewal certificate, I went with SCEP #1.  For URL Prefixes, enter in the full name of your tenant.  


Scroll down a bit.  Then for an application identifier, add com.apple.mobilesafari.


Next, publish and assign this new profile to the target endpoints.   Once the profile applied to the endpoint, you can confirm it's been applied by going to Settings --> General --> Device Management --> Device Manger. 


Click on more details.   You'll see among other things, the kerberos settings included in the profile.  


Click on Kerberos and you can actually see some of the specific settings you just configured. 


At this point, the configuration of Mobile SSO for iOS is complete.  We can proceed to enable device compliance as an authentication method.  For guidance, check out this next post, Securing Access To Horizon Through AirWatch Based Device Compliance.