This is a recipe for a UAG 3.4 Cascade mode deployment that supports the Tunnel Proxy and Per-App Tunnel features of Workspace One UEM (AirWatch). In this deployment model UAG appliances are deployed in pairs, with one sitting in the DMZ as a front-end server and a 2nd appliance sitting in the internal network as a back-end server. The front-end server helps authenticate connecting devices and relays traffic from the external world to the back-end server. The back-end server in turn reaches out directly to internal resources. These resources are then accessible to users on their mobile devices through the Web Workspace One app (AirWatch Browser) or through a Per-App VPN enabled app. Below is a diagram of Cascade mode, within a Workspace One UEM SaaS deployment, using the default external ports of 2020 for Tunnel Proxy traffic and 8443 for Per-App VPN Tunnel traffic.

If your deployment is not particularly challenged by draconian security policies, a double-hop DMZ, DNS restrictions or a spirt crushing bureaucracy, Cascade mode might not be worth the trouble. Ideally, you should chat with your Workspace One UEM (AirWatch) rep to confirm if the security enhancements warrant the up front complexity and potential latency. All that said, there are certainly folks who need Cascade mode. It is for these undeterred, Git-R-Done IT souls I dedicate the following process below. For guidance on a single appliance, basic endpoint UAG deployment for Per-App VPN check out this previous post.
Deployment Overview
The above diagram applies to Cascade mode deployments that use default ports. However, it's recommended to go ahead and leverage 443 for Per-App VPN traffic. Accordingly, the setup and traffic flow looks like this:

For your front-end appliance you'll need ports 443 and 2020 opened up to it's external interface. Also, it will need to have internet access to your Workspace One SaaS instance over 443. Finally, it's going to pass traffic to the back-end server over 443 and 2010. You'll need to allow the back-end appliance to receive this traffic, as well as ensure it has connectivity to any of the targeted internal resources. Further, while this internal back-end server isn't going to have any external traffic hit it directly, it's definitely going to need internet access to your Workspace One SaaS instances, just as with your front-end appliance. (Both appliances reach out to the Workspace One SaaS instance to retrieve their configurations.) Here's the specifics on the traffic rules, along with other system requirements: System Requirements for Deploying VMware Tunnel with Unified Access Gateway.
My high level steps for this Cascade mode deployment are:
- Deploy Front-end UAG Appliance
- Deploy Back-end UAG Appliance
- Configure VMware Tunnel On The Workspace One UEM (AirWatch) Console
- Configure VMware Tunnel Edge Services On Front-end Appliance
- Configure VMware Tunnel Edge Services On Back-end Appliance
- Deploy The VMware Tunnel App
- Configure A Per-App Tunnel Profile For iOS
- Configure Apps To Use The Per-App profile
- Configure Tunnel Proxy On The Workspace One UEM (AirWatch) Console
Deploy Front-end UAG Appliance
The simplest way to initially deploy and configure UAG is through the vSphere Web Client OVF deployment wizard and the gui on the UAG appliance itself. You can download the UAG appliance here from My VMware. Or you can use the link provided in the Workspace One UEM (AirWatch) console under the VMware Tunnel Settings Configuration.

After downloading the UAG appliance fire up the vSphere Web Client and launch the Deploy OVF Template wizard.

When prompted browse to the UAG ova download and click next.

Provide a VM name for the appliance and select next.

Select a host or cluster for the appliance and select next.

Review the details of the deployment and select next.

You'll be provided with an option of choosing between 1 to 3 nics for the appliance. For a POC or LAB go with a single nic.

For storage, select the storage that screams at you the least and go with Thin provision.

Confirm the virtual networks to leverage for the different types of traffic.

Finally, for the most exciting part of the deployment, the customize template dialog. First off, disable CIEP because you're selfish. Minimize it and get started on the network properties. Skip the first two options about custom routes and forwarding rules. Enter in your DNS server(s) and the appropriate IPMode. (Most likely STATICV4)

Scroll down further and enter in a default gateway, IP address and subnet mask for the primary nic. Also, enter in hostname for the appliance.

Finally, expand the password options section. Enter in passwords for the admin account and root account. Also select the proper edition of UAG.

Confirm all your options and select finish. Power on your VM once the appliance's deployment is complete.
For additional details and guidance on UAG deployments, check out this excellent blog: http://www.carlstalhood.com/vmware-access-point/
Deploy Back-end UAG Appliance
The process for the initial deployment of a back-end UAG appliance is pretty much identical to the process for your front-end appliance, with the major differences being the UAG appliance name, ip addresses and location within the trusted network. Otherwise, replicate the procedure you just followed for the front-end appliance. Here's the confirmation screen from my back-end server named UAGBackEnd:

Configure VMware Tunnel On The Workspace One UEM (AirWatch) Console
To configure VMware Tunnel on your AirWatch Console, navigate to Groups And Settings --> System --> Enterprise Integration --> VMware Tunnel --> Configuration. Select override, then enable VMware Tunnel.

Click on the Configure button to start a wizard. Enable both Proxy and Per-App Tunnel. Select Relay-Endpoint for the Proxy Configuration Type and select Cascade for the VPN Configuration Type. (I know, it's a bit weird and confusing. I like to think of both of these types as Cascade, with Relay-Endpoint just being a special name for a Proxy Tunnel Cascade deployment.)

The next Details screen is the most interesting and involved portion of the wizard. For the, "Relay Hostname," and "Frontend Hostname," provide the DNS name your external devices will connect to. For the, "Endpoint Hostname," and "Backend Hostname," provide the internal DNS name for your back-end UAG appliance. This is where the front-end UAG appliance is going to forward traffic to. (For very useful descriptions of these fields, check out this section from the VMware Tunnel On Linux Guide.) In my environment, the front-end appliance has the external DNS of connect.evengooder.com, while the back-end appliance resolves internally to uagbackend.lab.local. Accordingly, this is how I've filled out the wizard:

Next, go with the default of using AirWatch certificates.

For the authentication portion of the wizard, again, go with the default of using AirWatch issued certificates.

Under miscellaneous go with the defaults again.

Confirm your summary and save. If all goes well, you'll see the settings permanently stick under configuration.
Configure VMware Tunnel Edge Services On Front-end Appliance

After a successful login select the option to configure manually.

Next, click on the gear icon associated with, "VMware Tunnel Settings."

For the API server URL enter in the console URL for your Workspace One UEM (AirWatch) instance. For the API Server Username and Password enter in credentials of an AirWatch admin account with console administrator privileges at minimum. (In my environment, I created a basic admin account of Acct4Tunnel and made sure it had console administrator privileges.) Your organization group id can be determined by going to Groups And Settings --> Groups --> Organization Groups --> Organization Group Details. Finally, for your Tunnel Server hostname, enter in the external DNS of the UAG front-end appliance you specified in the Tunnel Configuration wizard on the console. The final configuration of VMware Tunnel Settings on your UAG appliance should look something like this:

After configuring these settings there should be a happy green circle next to your VMware Tunnel Settings.

To further confirm things are working properly, you can also do a connection test from the AirWatch console. Go back to the VMware Tunnel Configuration settings, under Proxy (App Wrapping/Borowser/SDK) and click on the, "Test Connection," button.

You'll get a result like this:

At first the red might seem alarming, but it makes sense at this point given we haven't configured the back-end appliance yet. However, these results do confirm the front-end appliance is communicating with the Workspace One SaaS instance. We also know the Workspace One console is able to communicate back to the UAG external interface at 2020. The next step is to make these red messages go away by configuring the VMware Tunnel Edge Services on the back-end UAG appliance.
Configure VMware Tunnel Edge Services On Back-end Appliance
Just as with the front-end UAG appliance, begin your configuration of the back-end appliance by pointing your browser at https://APPLIANCE_HOSTNAME_OR_IP:9443/admin/index.html and logging in as admin.
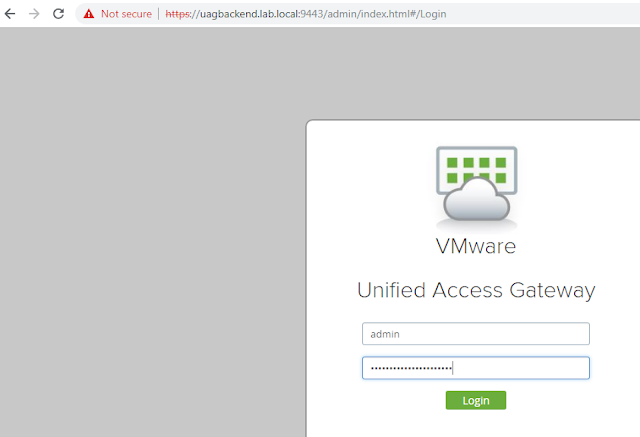
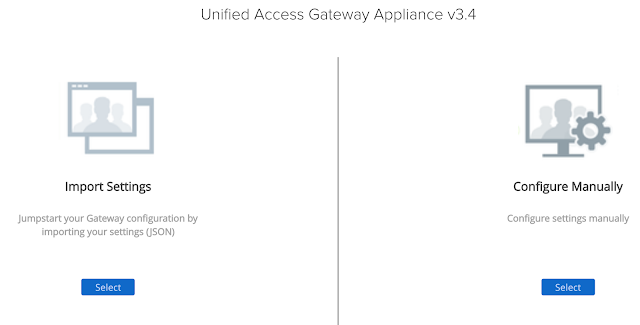
After a successful login select the option to configure manually.
Under General Settings click show next to the Edge Service Settings, then click the gear for VMware Tunnel Settings.

After a successful login select the option to configure manually.

Under General Settings click show next to the Edge Service Settings, then click the gear for VMware Tunnel Settings.

Here you'll fill out the VMware Tunnel Settings almost exactly the same as on the front-end appliance. The major difference in configuration will be the Tunnel Server Hostname. For that you'll enter in the internal DNS address of the back-end UAG appliance.

After hitting save you should get a happy green dot next to VMware Tunnel Settings.

Now, go back to the Workspace One console and navigate to Groups And Settings --> System --> Enterprise Integration --> VMware Tunnel --> Configuration. From here, you can give the Test Connection option for Proxy another try. Here's a sample of successful test.

You'll see similar positive results for the Per-App tunnel test. (This test is located directly below the Proxy configuration info.)

After hitting Test Connection you'll hopefully see successful connections from both your front-end and back-end appliances to the Workspace One SaaS environment.


Deploy the VMware Tunnel App

Click on the hyperlink for the IOS version then navigate to the assignment tab. From there you can add an assignment of the app to the appropriate assignment group.

Configure A Per-App Tunnel Profile for iOS

Provide a descriptive name for this new profile.

Navigate to VPN and click configure.

Note the server text box as been populated with your configured VMware Tunnel server. Check the box for "Enable VMware Tunnel."

For additional details, check this out.
Configure Apps To Use A Per-App profile
For testing purposes you can use the VMware vSphere Mobile Watchlist app. Go to Apps & Books --> Applications --> Native and then navigate to the Public tab. Do a search for vSphere and you'll see a hit for the VMware vSphere Mobile Watchlist for iOS. Click on Assign.

When configuring the assignment select Auto as the app delivery method. Scroll down and enable App Tunneling, selecting the Per-App VPN profile you've just created.

Then proceed with publishing this assignment.

At this point, the watchlist app will be deployed to your iOS device, configured to automatically leverage the VPN tunnel at execution.
Testing Per-App VPN Out
After confirming the VPN profile and Watchlist app has been assigned and installed to your mobile device, you can test the solution out. Fire up the Watchlist app. Enter in a vCenter server along with login credentials.

Upon successful login you'll have an option to select hosts or VMs from your vSphere environment.

At this point, you already know your VPN tunnel is working, but for fun you can traverse through your vSphere environment a bit. (Note: In the App Store reviews there's a lot of haters of this app. I'm not saying it's the best thing since sliced bread. It certainly makes for a handy test app though.)
It's not necessary to launch the VMware Tunnel mobile app for the process to work, but if you do open up the app you get a display confirming current connectivity.

And if you navigate to settings on your iOS device and look at VPN, you'll see some additional confirmation the connection has been made.

Configuring Tunnel Proxy On The Workspace One UEM (AirWatch) Console
To test out Tunnel Proxy, we need push out the Web Workspace One app (AirWatch Browser) and make just a couple adjustments on the console. To push out this browser app, go to Apps And Books --> Native --> Public and select the option to add an application. Do a search for Web - Workspace One.

Go ahead and push the app out to your endpoint. Then, navigate to Groups & Settings > All Settings > Apps > Settings and Policies > Security Policies. Select Enabled for AirWatch App Tunnel and specify the App Tunnel Mode as VMware Tunnel – Proxy. If you want to enable split tunnel so that Tunnel Proxy is only used for specific URLs, while other traffic goes directly from the browser to the internet, add some app tunnel URLs. Otherwise, all request will be forwarded through VMware Tunnel.

Finally, go to Groups & Settings > All Settings > Apps > Workspace One Web. There you can enter in allowed sites and a home page.

Now, if you open up Workspace One Web mobile app, you can navigate to internal web sites when offsite. Here's a sample screenshot:

Some Incredibly Relevant Official VMware Documentation
System Requirements for Deploying VMware Tunnel with Unified Access Gateway


