With the steps detailed in my previous posts complete, we can begin to leverage AirWatch device compliance for conditional access. Using this authentication method you can mandate device compliance in AirWatch as a prerequisite for access to an application. In this post, access to a Horizon desktop pool is going to be restricted to devices that are not only AirWatch enrolled, but also compliant according to AirWatch compliance policies. For guidance on the prerequisites for enabling this feature, see this previous post. Otherwise, follow the steps below to enable device compliance as an authentication method in vIDM.
Enabling Device Compliance
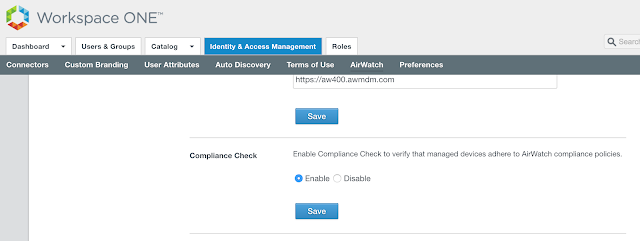
Within the vIDM console, navigate to Identity & Access Management --> Setup --> AirWatch.
Scroll down to Compliance Check. Select enable and click save.
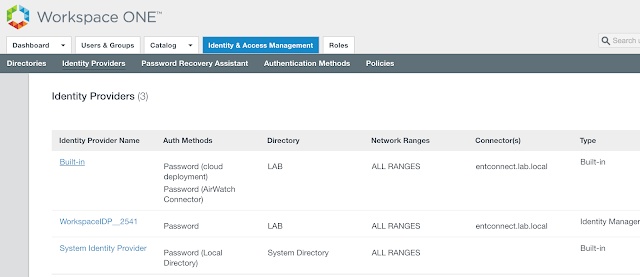
 Next, to leverage device compliance as an authentication requirement within vIDM access policies it needs to be enabled as an authentication method within the Built-in identity provider. To do so, navigate to Identity & Access Management --> Manage --> Identity Providers. Click on the hyperlink for Built-in.
 From there, scroll down to authentication methods and check the box for, "Device Compliance (with AirWatch)." Then scroll down further and hit save.
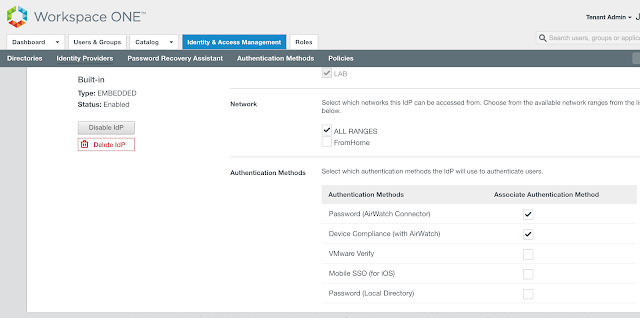 At this point, "Device Compliance (with AirWatch)," will show up as an option under access policies.
Mandate Device Compliance For Horizon Access
We can now make AirWatch device compliance a prerequisite for Horizon access through the creation of an access policy in vIDM. Within the vIDM management console, navigate to Identity & Access Management --> Manage --> Policies.
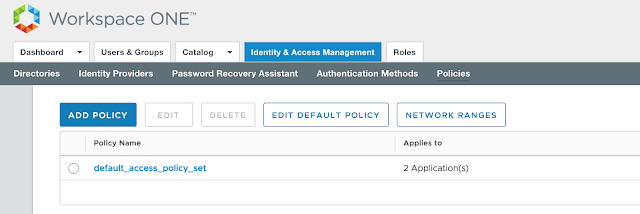 Click the Add Policy option.
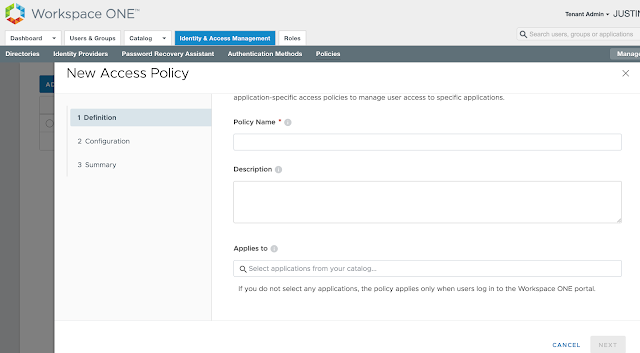
Provide a descriptive name for the policy and select the relevant Horizon entitlement.
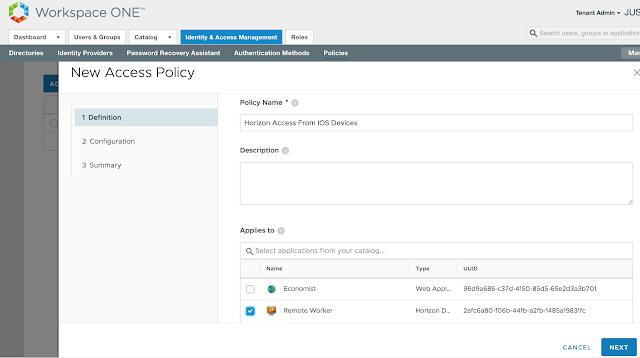 Next, under configuration, select, "Add Policy Rule."
 Pick a network range for this new rule as well as applicable device type. For this test, I'm going to select ALL Network ranges and iOS. Then, for authentication requirements I'm going to select both, "Mobile SSO (for iOS)," and, "Device Compliance (with AirWatch)."
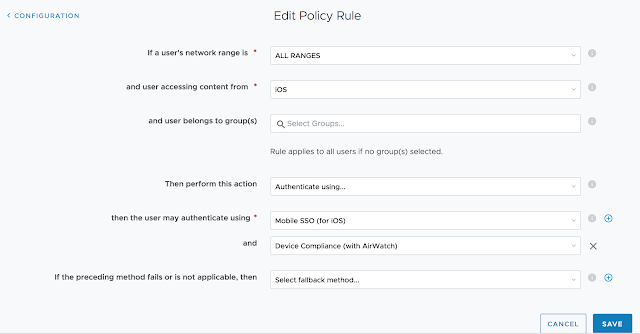 This mandates that folks trying to access this Horizon desktop pool from an iOS device must have an AirWatch compliant device.
Confirm the summary information and hit save.
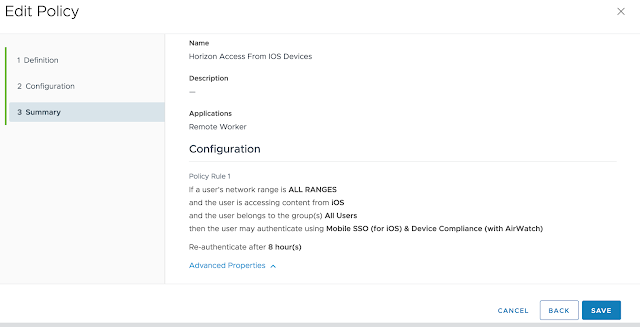
You'll see your new access policy show up under policies.
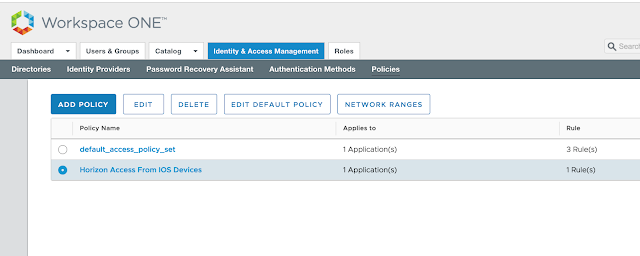 With this policy in place folks who try to launch the Remote Worker Horizon desktop pool from iOS devices won't be granted access unless their device is compliant according to defined compliance policies in AirWatch. If they're endpoint isn't compliant, they'll get a message like this when trying to launch the virtual desktop.

Creating A Compliance Policy In AirWatch
To test device compliance for Workspace One delivered applications we need to enable a test compliance policy within AirWatch. From the AirWatch console, navigate to Devices --> Compliance Policies --> List View. Click on the Add button.
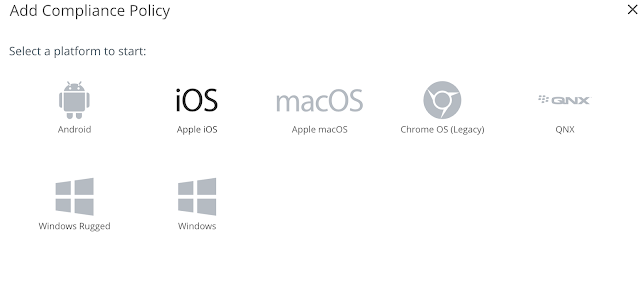
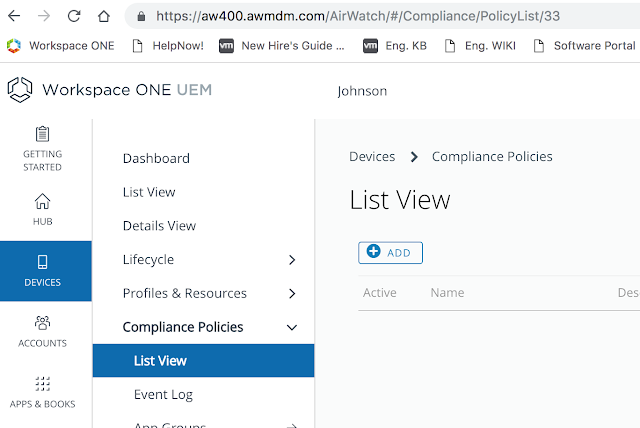 Since I'm testing against an iPad device I'm going to create a compliance policy for iOS.
 For the sake of testing, I'm going to create a policy that's sure to mark my iPad as noncompliant, one that flags devices that are below iOS 11. (My iPad is 9.35.)
 For actions, I'm just going go with notify. In real life, you'd probably get a little more involved than that.
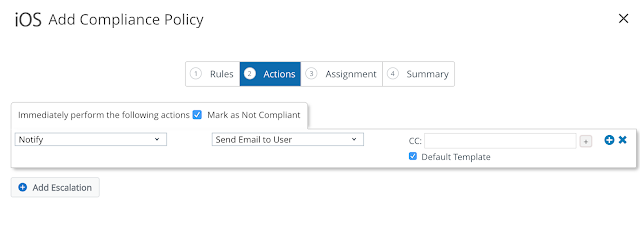 Again, for testing, I'll just apply this policy to all devices.
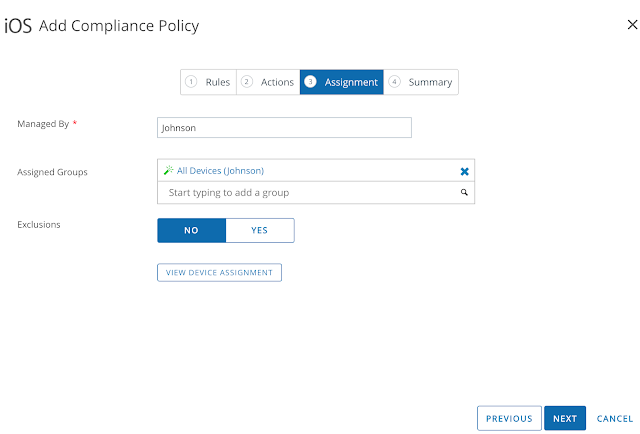 Finally, after reviewing the summary, click Finish & Activate.
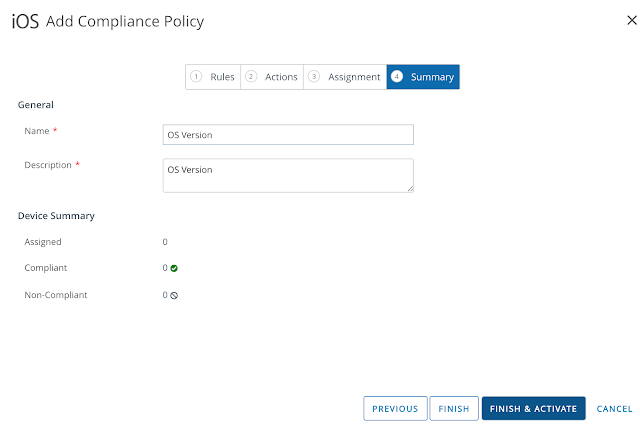 At this point the newly created policy shows up under the list view for Compliance Policies.

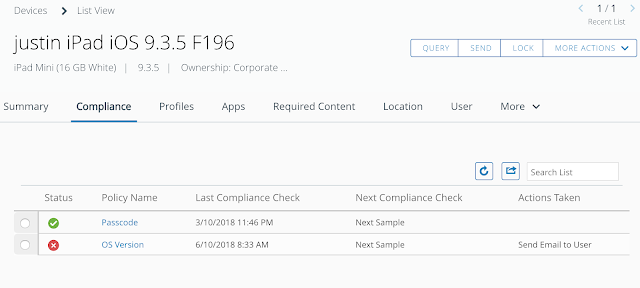
Once this policy gets evaluated it's status shows up as red under my devices Compliance tab.
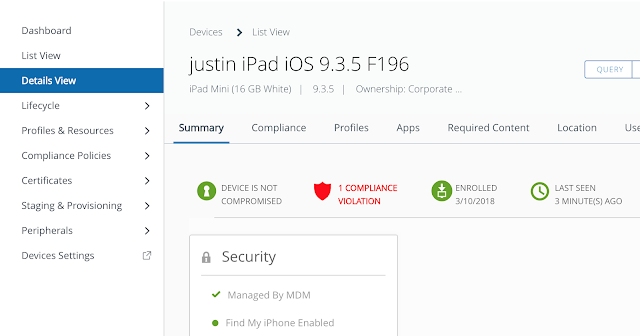
And the device is reported as having a compliance violation.
At this point, if I try to access my Remote User Horizon desktop pool, I get the error:

Not only do we get an explanation for why access is denied, but we also get the name of the violated policy and it's description. Theoretically, in the real world, a user would go on to upgrade the device in order to be complaint. For testing, you can just remove the OS Version compliance policy from the endpoint and the device will go from non compliant to compliant. At that point, access to the virtual desktop will work as expected.
The main integration between vIDM and AirWatch is accomplished by populating a single configuration page in vIDM with special credentials from AirWatch. Gatherings these credentials ahead of time is probably the trickiest part of the process.
Gathering REST API Keys From Workspace One UEM (AirWatch)
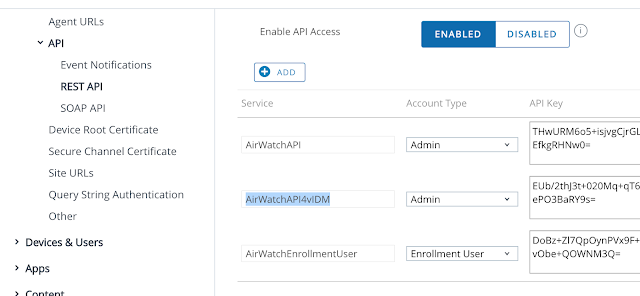
The first step is to create the REST API keys for Admin and Enrollment User account types. Go to Groups & Settings > All Settings > System > Advanced > API > Rest API. Click on the add button to create an API Key for an account type of Admin. Use a descriptive name. Then click Add again and create an API Key for an account type of Enrollment user. For my environment, I created a service named AirWatchAPI4vIDM for the admin account type. Then I created a service called AirWatchEnrollmentUser for the enrollment user account type. The API key was automatically generated by AirWatch. You'll need copies of both these API keys when populate AirWatch settings into vIDM a few steps from now.
Getting The AirWatch Administrator Root Certificate
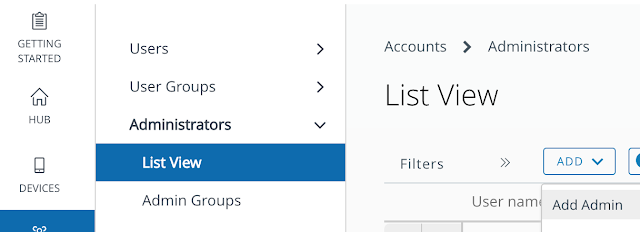
Next, you need to get your hands on an AirWatch administrator root certificate. Go to Accounts > Administrators > List View to create a new admin account. Select the Add option, then Add Admin.
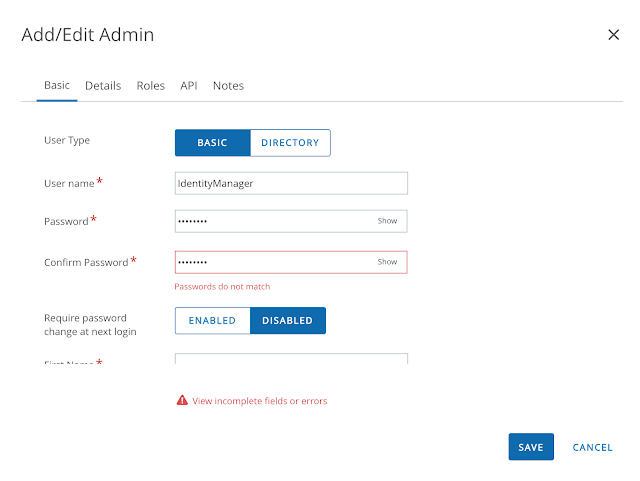
 Create an admin account with a memorable or not so memorable name.
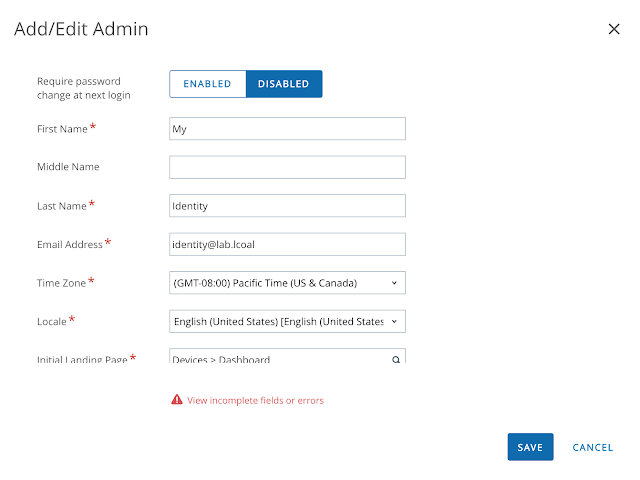
 Populate all the required fields.
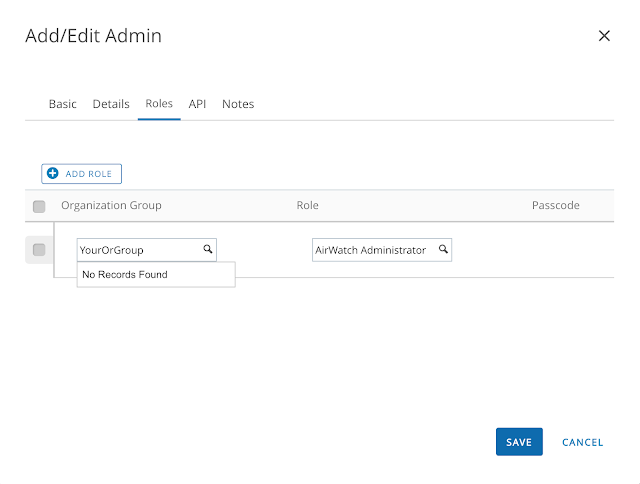
 Next click on the roles tab. Ensure that you've selected the correct Organization group and AirWatch Administrator role.
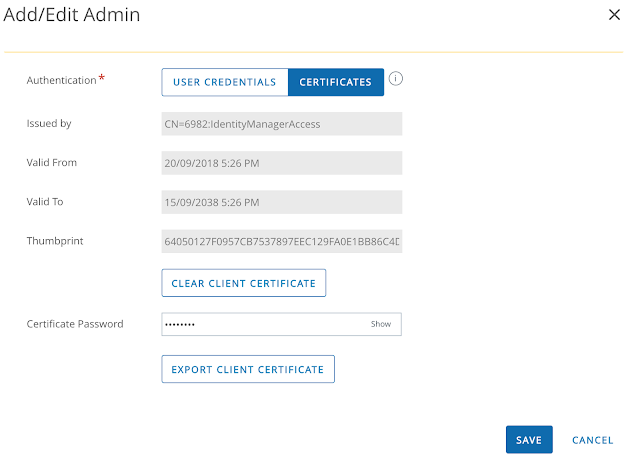
With the admin account created, from list view, click on the hyperlink for the newly created account. Navigate to the API tab, scroll down, enter in a certificate password and then export the client certificate to easily accessible location.
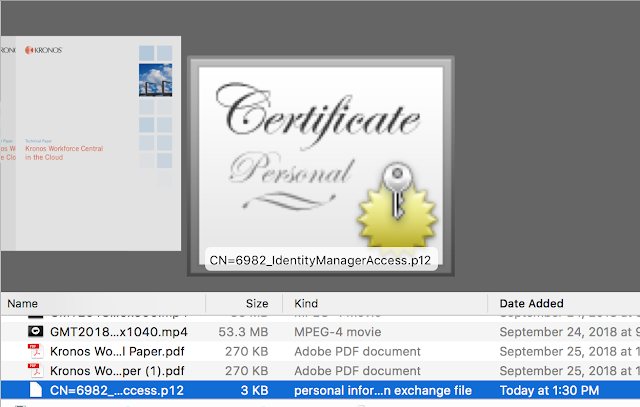
 Export the client certificate and keep it somewhere easily accessible.
Putting Them Both Together
With REST API keys and certificates in hand, we can begin the integration of vIDM with AirWatch. Log into the vIDM as a tenant admin. Then from within the admin console navigate to Identity And Access Management --> Setup --> AirWatch. For the API URL, enter in your console URL. Upload the certificate you just downloaded. Enter in the API keys you created earlier. Finally, enter in your group ID and hit save.
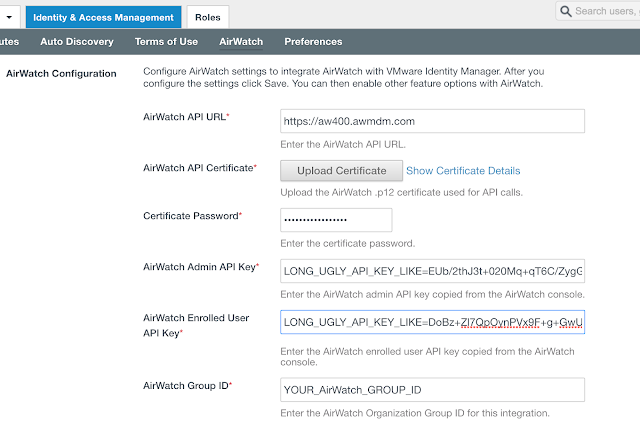 Scroll down and select the option to integrate catalogs from AirWatch and vIDM.

A Unified Self Service Console
The immediate benefit of this initial integration between AirWatch and vIDM is a unified self service catalog. There's a single self service portal to subscribe to both native Mobile apps from AirWatch as well as web and virtual apps from vIDM. If you're logged into the Workspace One mobile app on a device you've enrolled you'll see options to both install mobile apps as well as bookmark your web and virtual apps for the Workspace One portal. When logged into my older iPad, I can see both the Horizon virtual desktop I'm entitled to through vIDM along side the mobile apps I've been assigned through AirWatch.

Whether I'm on my laptop or mobile device, I follow the same basic process for entitling myself to apps that are relevant to my underlying form factor.
A next step in the integration between AirWatch and vIDM enables conditional access based on device compliance. A prerequisite for enabling device compliance is to setup and configure the Mobile SSO for iOS authentication method, something I detail in this next post, Configuring Mobile SSO For iOS In Workspace One UEM (AirWatch).
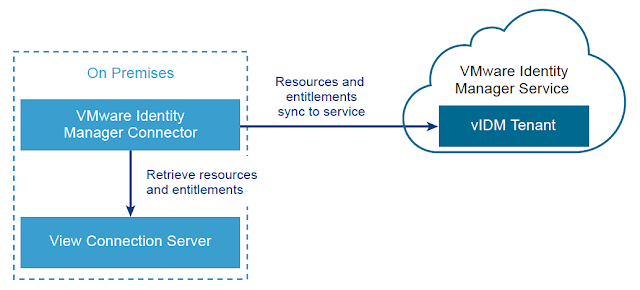 Once a vIDM Connector is successfully deployed on premise and integrated with a customers Active Directory environment, integrating with Horizon is relatively straight forward. For guidance on getting the vIDM connector deployed and integrated with AD, check out this previous post, Integrating A SaaS Instance Of VMware Identity Manager With On Premise Active Directory.
Preparing The Horizon Connection Server
Prior to syncing the vIDM connector with the Horizon environment, the Horizon Connection server must have SAML authentication enabled and SAML authenticators created. Within the Horizon Administrator, navigate to View Configuration --> Server --> Connection Servers. Select the Connection server you want to integrate vIDM with and select edit.
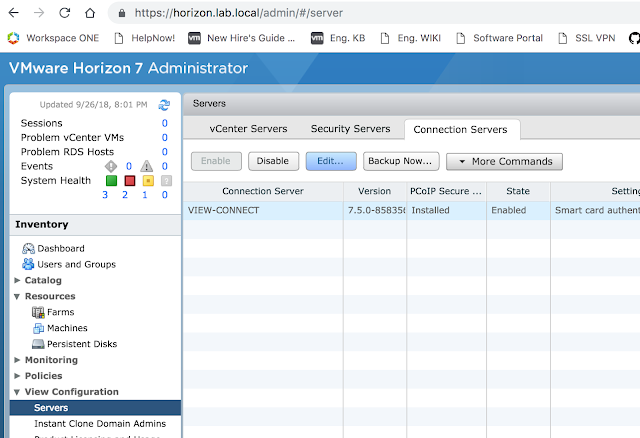 Then select the Authentication tab.
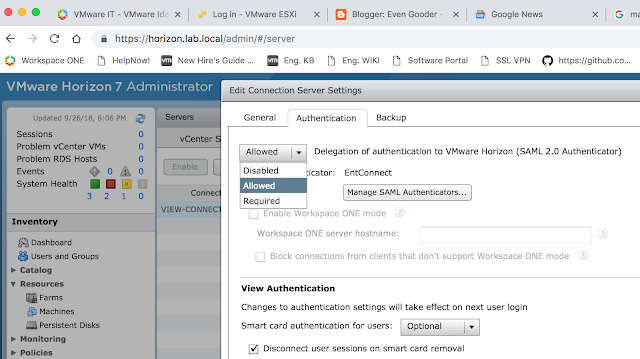 Select Allowed or Required for the, "Delegation of authentication to VMware Horizon (SAML 2.0 Authenticator)." Then click on, "Manage SAML Authenticators."
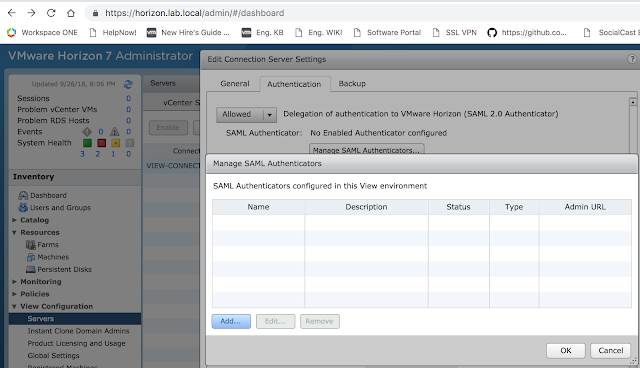 From there, click the Add button to create a new SAML authenticator.
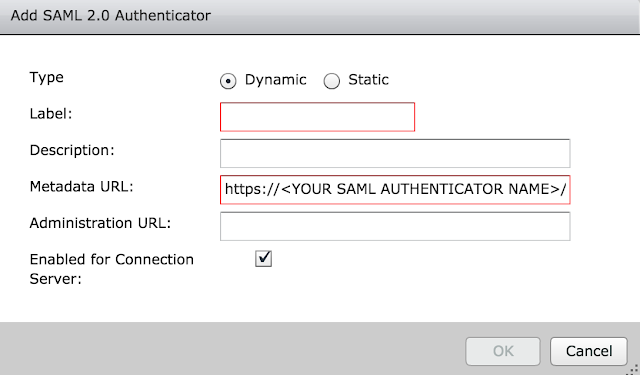 The metadata URL is already pre-populated for you. You need to enter in the vIDM instance URL where it has <YOUR SAML AUTHENTICATOR NAME>. My vIDM instance is https://justinjohnson.vmwareidentity.com, so my entry looks like this:
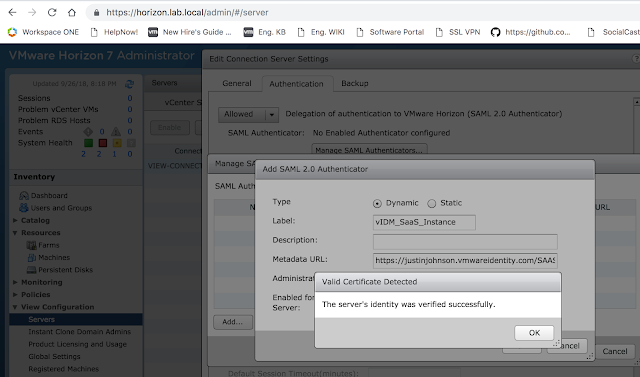
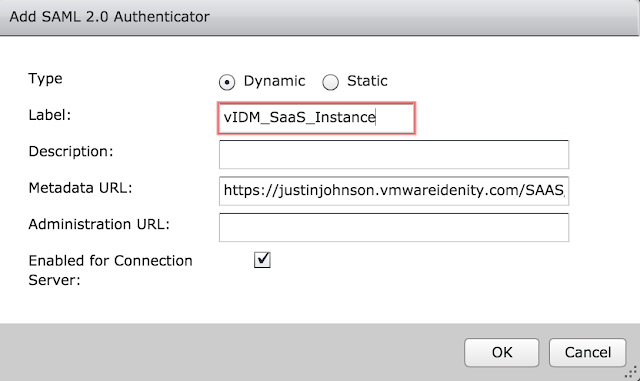 Click okay and then save. If all goes well, you'll get a message box indicating the vIDM server's identity has been verified.
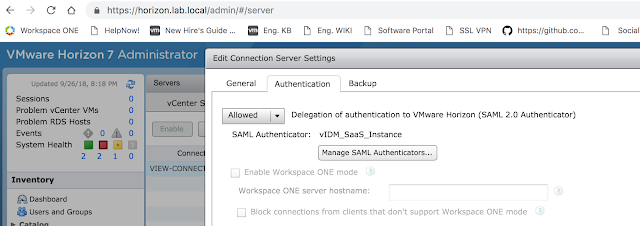
 Okay your way out of the dialog boxes and confirm your new authenticator is selected, then click okay a final time.
 The next step is to create a Virtual App Configuration in vIDM.
Creating A Virtual App Collection On vIDM
Now that the Horizon Connection server is ready, log into the Administrator console of vIDM. Click on Catalog --> Virtual Apps.
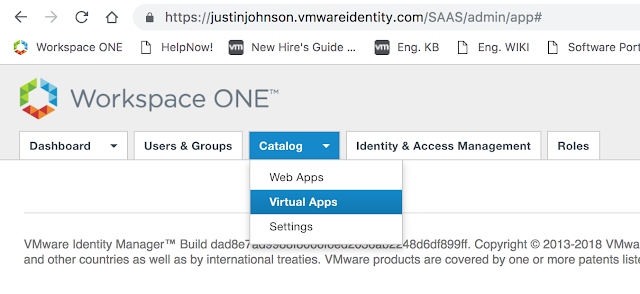 From there, click on Virtual App Configuration.
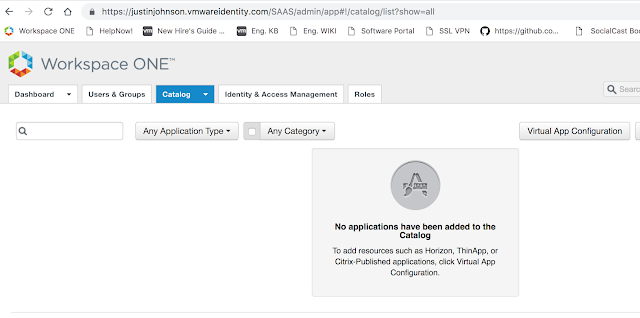 You'll see a button, "Add Virtual Apps." Click on it and select, "Horizon View On-Premises."
Next, add a name for this Virtual App Configuration. Select the recently created vIDM Connector as the Sync Connector. Also enter in the name of your Horizon Connection server and admin credentials for that environment.
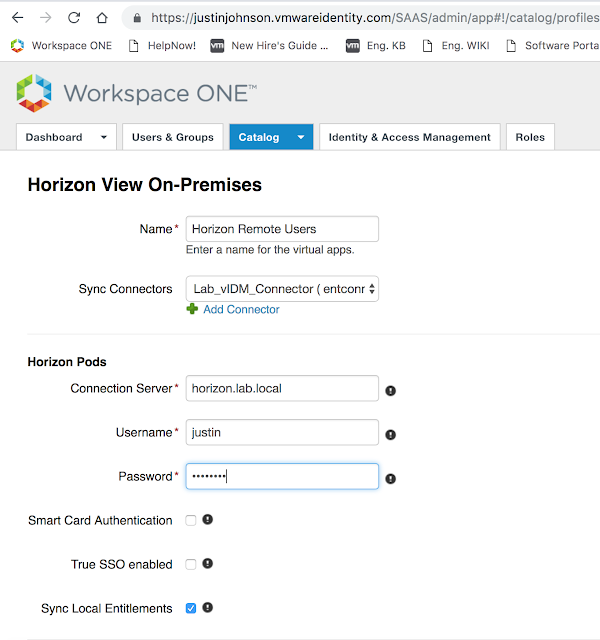 Enable any other policies you want enabled, then select select save.
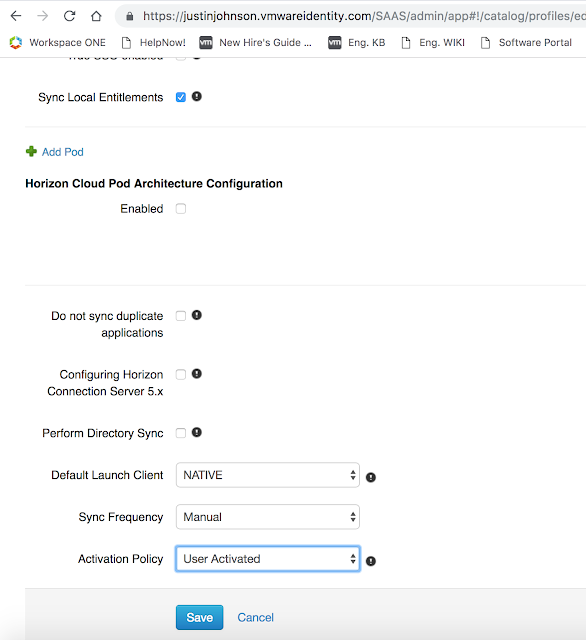 Now, you'll see this new configuration show up under Virtual App Configuration.
 Click on Sync.
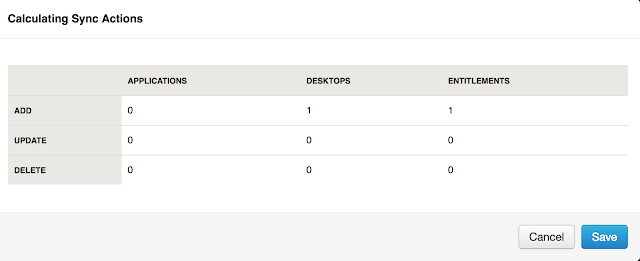 After performing a sync, return back to Catalog --> Virtual App. You should see see your Horizon entitlement(s).
Leveraging Different Horizon Client Access URLs For Different Network Ranges
A common desire for vIDM implementations is to redirect users from different network ranges to different Horizon Connection server URLs. For example, to have internal users hit internal connection servers directly as opposed to leveraging an external security server or UAG appliance. This is fairly easy to configure in vIDM. First, navigate to Catalog --> Virtual Apps --> Virtual App Settings. There, you'll see any network ranges that have been configured for vIDM under Manage --> Policies. Here's a screen shot from where you configure the networks:
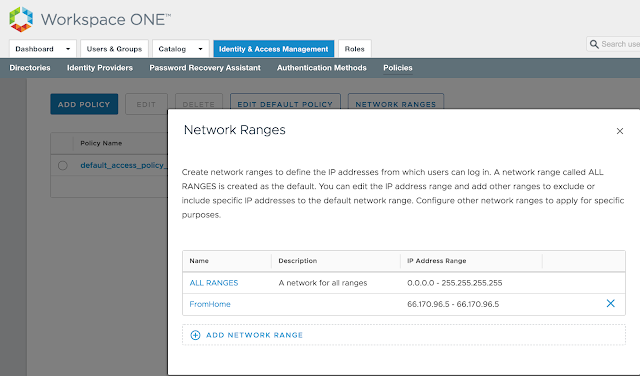 You'll see these very same network ranges under Virtual App Settings --> Network Settings.
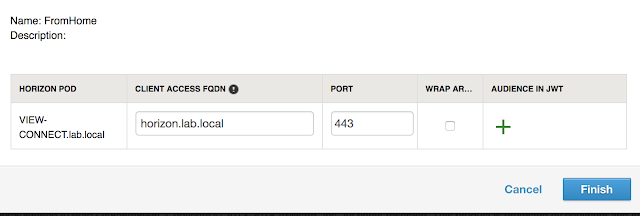
 For my environment, uag.evengooder.com is the default client access URL. When clicking on the hyperlink for, "ALL RANGES," in my environment, you'll see the following:
 So everyone who isn't making a request from a defined scope will default to uag.evengooder.com. However, folks who's requests are originating from my home lab, as defined by the, "FromHome," network range, are redirected to my internal Horizon Connection server, horizon.lab.local.
 One thing to note is there's a bit of a limitation to this functionality when it comes to SaaS deployments of vIDM. The network range doesn't necessarily map out to ip addresses that are specifically assigned to endpoints. It's all about what IP address that endpoint request is working through to access vIDM. So if you have an endpoint that's connecting from an internal network through an NATted address, the source ip address for that endpoint is whatever that NAT address is, not the ip address that's directly assigned to the endpoint. So to accommodate my lab, I used the external IP address of my router for my network scope, not my internal IP address.
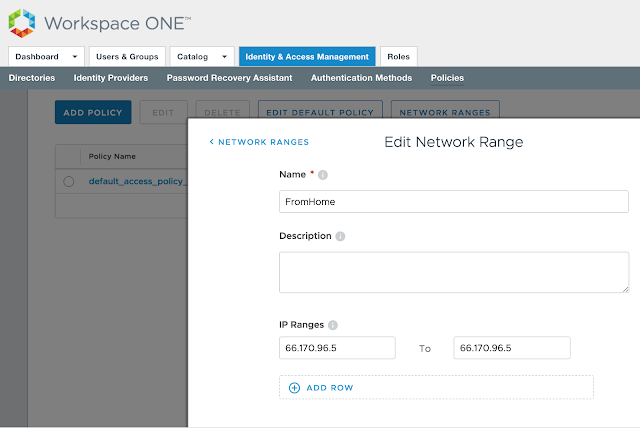 Just something to keep into consideration when defining network scopes. If you absolutely need to base conditional access off the directly assign IP address of your endpoints in an internal network, you'll need a vIDM instance that's setup within that trusted network.
With both AirWatch and vIDM successfully integrated with your on premise environment, the next step is to integrate the 2 separate SaaS instances directly with each other. How to achieve this is the topic of my next post, Integrating Cloud Instances Of Workspace One UEM (AirWatch) And VMware Identity Manager.


 Pick a network range for this new rule as well as applicable device type. For this test, I'm going to select ALL Network ranges and iOS. Then, for authentication requirements I'm going to select both, "Mobile SSO (for iOS)," and, "Device Compliance (with AirWatch)."


